Bread proofing: temperature and readiness
Proofing is the final rise after shaping. Look for a lighter, aerated dough and the rise described in your recipe; use time as a checking window, not an automatic finish signal.
CookBook TeamUpdated
Bread proofing temperature: a practical starting point
For a dough made with commercial yeast, start at 24 to 26 °C (75 to 79 °F). Follow a recipe’s specified temperature when it gives one. Measure the dough as well as the place where it rises [1].
| Dough | Starting temperature | What to watch |
|---|---|---|
| Commercial-yeast bread or pizza | 24 to 26 °C (75 to 79 °F) | Expansion and a lighter, aerated feel [1] |
| Sourdough | 27 to 30 °C (80 to 86 °F) | The recipe’s target rise and signs of fermentation [1] |
| Sweet or butter-rich dough | 27 °C (80 °F) or below | Keep butter from melting out of the dough [1] |
| Rye dough | 27 to 30 °C (80 to 86 °F) | Use the recipe’s volume cues rather than a strong wheat-dough spring [1] |
Bulk fermentation or final proof?
Bulk fermentation is the rise after mixing, while the dough is still one batch. Shape it after this stage. Final proof is the rise of the shaped loaf, rolls or pizza before baking [2]. Mark the starting height on a straight-sided container to make expansion easier to follow. A fold during bulk and a finger test after shaping answer different questions.
Is the dough under-proofed, ready or over-proofed?
| What you notice | What it suggests | Next action |
|---|---|---|
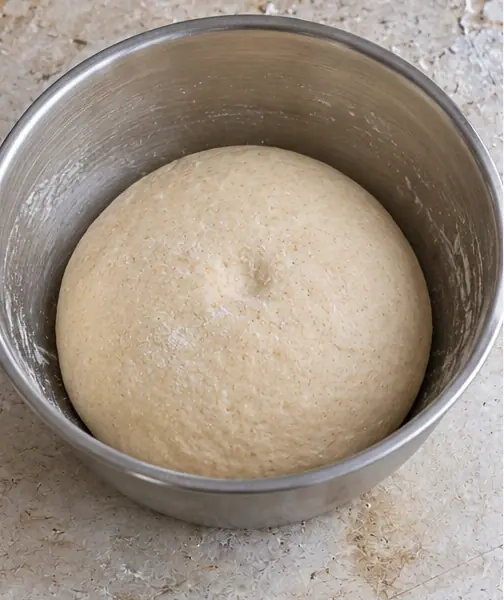
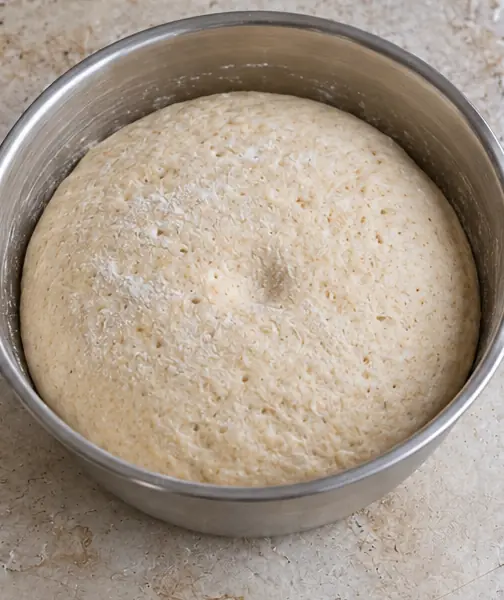
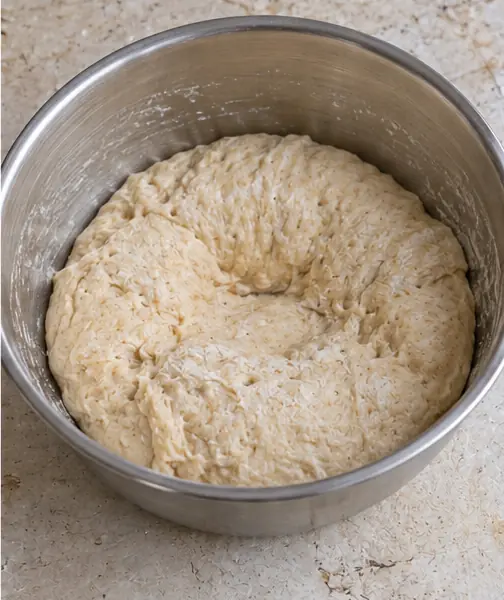
| Dense dough; a light indentation fills quickly | More final proof is needed | Keep it covered and check again. |
| Dough feels airy; an indentation remains visible | It may be ready to bake | Check the recipe’s rise cue and bake in a preheated oven. |
| Fragile surface; dough sinks or collapses when touched | The dough may be over-proofed | For a suitable yeasted loaf, gently reshape and let it rise again; expect a shorter final rise. |
For the poke test, flour a fingertip and gently indent the shaped dough. A quick rebound suggests more time; an impression that remains, without collapse, suggests readiness. A cold or very wet dough needs its recipe’s other cues too. Start checking near the beginning of the suggested rise window [3].
Choose a steady place to rise
- Cover the dough so its surface stays supple.
- Use a room or proofing space with a measured, steady temperature. A switched-off oven can help, but test it with a thermometer first.
- Keep the dough away from direct heat. Some oven proof settings are warmer than a bread recipe needs.
- Preheat a separate oven, or remove the dough before switching its proofing oven on.
An oven light can make a useful warm space, but its effect varies by appliance. Measure rather than assume it is gentle enough [4].
If the dough is slow, sticky or spreading
- Slow rise: check temperature and yeast freshness before adding more yeast to a mixed dough. A cold dough needs time to warm through.
- Dry skin: improve the cover; do not work a dry crust into a shaped loaf.
- Sticky or spreading: check hydration and dough strength as well as fermentation. Adding flour changes the recipe.
- Missed your baking time: use a recipe with a planned cold stage rather than leaving dough somewhere hot to catch up.
Plan your next bake
Use the hydration guide for the flour and water calculation, compare poolish, biga and levain or follow a cold-fermentation pizza workflow. The yeast converter helps when you have a different yeast type. Save your recipe and record the temperature and rise cues in CookBook for the next batch.
Sources
A little more help
Frequently asked questions
Does proofing always take one hour?
No. Temperature, yeast dose, flour and the dough’s starting temperature change its pace. Use the recipe’s rise and readiness cues.
Should I double yeast to make dough rise twice as fast?
No. More yeast does not produce a reliable half-time schedule. Use a recipe designed for the time you have.
Still have a question? Visit our help centre.
Cite this page
Referencing these numbers or explanations? Copy this citation and link to the page.
“Bread proofing: temperature and readiness”, CookBook Manager. Updated . https://cookbookmanager.com/guides/bread-proofing
Text, tables and data on this page are available under the Creative Commons Attribution 4.0 licence (CC BY 4.0). Credit CookBook Manager and link to this page when you reuse them.
Keep reading
- Dough hydration explained
- Poolish, biga and levain compared
- Caramelization explained
- Maillard reaction vs caramelization
- Sugar syrup stages and temperatures
- Types of pastry compared
- French, Swiss and Italian meringue compared
- Cold-fermentation pizza dough guide
- Mother sauces, roux ratios and practical fixes
- Fresh pasta: ratios, rolling and troubleshooting